How to Print Labels
Printing your own labels can be extremely useful for businesses, homes and schools. Whether it’s printing address labels for envelopes or personal crafting projects, labels allow you to easily find objects and make organisational tasks painless. Our guide outlines the process simply and also allows you to troubleshoot problems such as alignment issues and smudging.
- Choosing the Right Label Type
- Download or Select a Label Template
- How to Design Professional Labels
- How to Print Labels in Word
- Using Mail Merge for Labels
- Adjust Printer Settings
- Perform a Test Print and Troubleshoot
- FAQ
Step 1: Choosing the Right Label Type
There are a few different types of label, which of these is best for you will depend on what you need labels for:

Address Labels: Perfect for streamlining the workflow of businesses that need to send products or correspondence to customers, different addresses can be printed at scale. Perhaps your business needs to print return mailing labels?
Name Badge Labels: Great for visitors to an office, networking events and more, name badge labels allow you to easily identify people.
QR Code Labels: These useful labels allow you to communicate more information to your customers than standard labels would allow by directing users online.
You’ll need to be sure you buy the right type of labels for your printer, as some are only suitable for inkjet printers or laser printers respectively. Inkjet-specific label sheets absorb ink to prevent smudging. Laser-specific label sheets are heat-resistant in order to withstand the high temperatures involved in laser printing. Some however, will accept both. Consult the packaging or product information to choose the right type of labels for your printer.
The shape and size of the labels, as well as how many labels per sheet there are will also need to be considered.
Top Tip: Prevent labels curling up by storing them in their original packaging, in a cool, dry area and avoiding humidity.
Step 2: Download or Select a Label Template
Choosing to use a template has a few benefits over designing your own labels from scratch. Templates save time, are pre-sized and formatted to fit label sheets.

Office Software: Microsoft Word, Google Docs and Canva all offer built-in templates. Search ‘labels’ where you would find templates.
Label Brand Websites: Label manufacturers may provide templates that are compatible with their label sizes.
Make sure to match the template size to the label sheets for accurate alignment.
Step 3: How to Design Professional Labels
Follow the below advice to create labels that stand out.
Choose the Right Design Tool
Microsoft Word, Google Docs and Canva all offer pre-made templates. Use Adobe Illustrator for more advanced customisation options.
Decide on Key Elements
Fonts
Fonts used for labels should be legible and easy to read, especially for small labels that require clarity. Labels for professional use (e.g. products), would benefit from the Sans Serif font, as it looks clean and can be great for establishing authority and trustworthiness. Labels for crafting or personal projects meanwhile can use more decorative fonts, in order to add some personality to your labels. Font size will vary based on label type, you should use a larger font for address labels and finer text for product labels, to fit all the important information you need to communicate.
Colours

The impact your colour scheme can have on your label printout shouldn’t be underestimated. If the labels are for a brand, you should stick to your brand colours for consistency. Labels for personal use can be more creative, but you should still avoid very light colours on white paper, for better readability. It should also be noted that colours may appear differently based on the finish of your labels.
Images and Logos
If you want to include icons or logos on your labels, you should ensure that they are a high-resolution. For optimal print quality, save your images as PNGs or vector files and also keep the design in high contrast. Pay attention to the border of your labels and ensure the design doesn’t get cut off. You should place important imagery in the safety area and avoid the trim (outside of the safety area) and bleed (outer edge).

How to Print Labels in Word
Windows
To print a single label, in Word, head to ‘Mailings’ and ‘Labels’ and select ‘Single label’.
To print a sheet of labels, follow the below instructions:
1. Head to ‘Mailings’, then ‘Labels’.
2. Go to ‘Options’, select your label vendor and find your product. Click ‘OK’. (In the event you can’t find your product, select ‘New Label’ and set up a custom label.)

3. Input the address and enter any additional information in the ‘Address’ field. Click on the open book icon to use one from your contacts.

4. Select your text, right-click and select ‘Paragraph’ or ‘Font’ to edit the formatting of the address and then click ‘OK’.
5. Check the ‘Full page of the same label’ option.
6. Click ‘Print’ to start the printing process.
7. Selecting ‘New Document’ lets you save, edit and print another time.
Mac
For printing labels in Word on Mac, the instructions are similar:
- Click on ‘Mailings’, ‘Labels’, then ‘Options’.
- Choose the ‘Printer type’, ‘Label products’ and ‘Product number’. If you can’t find your label, select ‘New Label’ and set up a custom label. Press ‘OK’.
- Input the address and any additional information in the ‘Delivery Address’ field. Click the open book (Insert Address) to add an address from your contacts.
- Select your text and click ‘Font’ to alter formatting.
- Be sure to select the option for ‘Full page of the same label’.
- Press ‘OK’ and then ‘Print’.
- Select ‘New Document’ to save, edit and print your labels another time.
Using Mail Merge for Labels
Mail Merge allows you to import an address list from an Excel spreadsheet into Word, where you can print them out as labels.
Windows

For this you’ll need your address list (in Excel) to use Mail Merge (in Word). First of all, proof your data to ensure it’s all correct.
In Word, head to ‘Mailings’, select ‘Start Mail Merge’ and then ‘Step-by-Step Mail Merge Wizard’.
- Once you’ve found the ‘Mail Merge’ menu, select ‘Labels’.
- Choose ‘Starting document’ and then ‘Label Options’. Now select your label size.
- Select your label vendor and product number (check the packaging if you’re unsure). Then press ‘OK’. In the event you can’t find your label here, select ‘New Label’ and input your label information, type in a name and press ‘OK’. The new label will now be added to the ‘Product number’ list.
- Click ‘Select recipients’, ‘Browse’ and upload your mailing list. Click on your mailing list table and then ‘OK’. Press ‘OK’ again.
- ‘Arrange your labels’ to match your desired layout. Input recipient information in the ‘Address block’ field and press ‘OK’.
- Choose ‘Update all labels’ in order to copy the first label.
- Click ‘Preview your labels’ to change paragraph spacing etc., if necessary.
- Click ‘Complete the progress’ and then ‘Print’ and ‘OK’ twice.
- Finally, select ‘File’ and ‘Save’ should you wish to save the document.
Mac
- Head to ‘Mailings’, ‘Start Mail Merge’ and then ‘Labels’.
- Under ‘Label Options’ choose your label’s supplier in ‘Label products’.
- Select your product number from the list (check the packaging). If you can’t see your labels here, select ‘New Label’, input the label information and name it. Pressing ‘OK’ adds the label to the ‘Product number’ list.
- Press ‘OK’. You should be able to see a table with your label’s outline. Don’t see this? Click ‘Table Layout’ and ‘View Gridlines’.
- Select ‘File’ and then ‘Save’.
- Head back to ‘Mailings’ and ‘Select Recipients’ to choose recipients.
- Press ‘OK’.
- Select ‘Mailings’ again then ‘Insert Merge Field’ in order to choose which fields will appear on the labels. Press ‘OK’.
- Edit the fields in the first label until the format looks the way you want all of them to.
- Head to ‘Mailings’ and then ‘Update Labels’.
- Select ‘Mailings’ and ‘Preview Results’.
- Select ‘Preview Results’ once more to add, view and remove merge fields. Then select ‘Update labels’.
- Finally, in ‘Mailings’, select ‘Finish & Merge’ and ‘Print Documents’.
In order to edit each singular label, head to ‘Mailings’, ‘Finish & Merge’, ‘Edit Individual Documents’, ‘File’ and then ‘Print’.
Step 4: Adjust Printer Settings
Before printing your labels, you should pay attention to the following settings to ensure a smooth printing process and prevent potential issues.
Paper Type
Also known as Media Type, this setting determines how fast media is fed through the printer. Set the paper type to Labels or Heavyweight if these options are available. This ensures that the printer adjusts for thicker label sheets. Adjusting printer settings for labels reduces the feeding speed and helps to prevent misalignment. Choose premium, cardstock or heavyweight if the labels option isn’t available. Cardstock and labels may require the sheets to be fed through a different tray, such as the manual tray, which flatly feeds the paper through your printer.
Tray Selection
Use your printer’s manual tray where possible, as it handles thicker sheets better and reduces jams.
Print Quality
Ensure your settings are set to standard or high-quality for clear text and images. Also avoid using draft mode, as this may produce low-quality label prints.
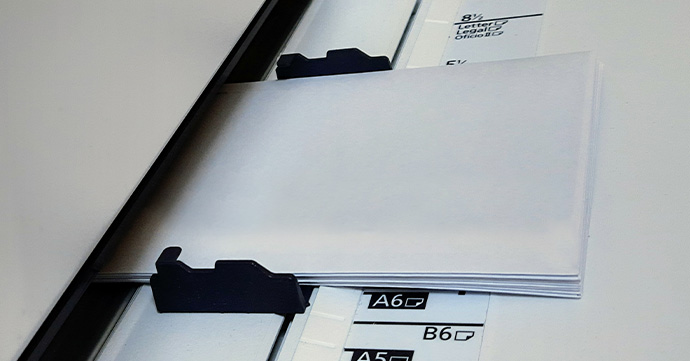
Paper Size and Orientation
Confirm the paper size and orientation (portrait/landscape) matches the template layout. Check the label packaging for details on paper size.
Scaling
Set the scaling to either ‘100%’ or ‘Actual Size’, as not doing so can misalign label positioning.
Step 5: Perform a Test Print and Troubleshoot
Print a test page on plain paper to ensure the alignment is correct prior to inserting labels into the printer.
Troubleshooting
Alignment Issues:
To fix alignment issues, ensure scaling settings are ‘Actual Size’ or 100% scaling. You should also check that the label template matches the sheet size. Finally, test your print on plain paper to check the positioning.
Smudging Issues:
To resolve smudging issues on your inkjet printer, set the paper type to Labels or Heavyweight. Doing so will slow down your feeding speed and reduce the likelihood of your prints smudging. Also, allow the ink to dry fully before handling the labels. Try waterproof labels to avoid smearing. Last of all, make sure you’re using a compatible printer. You can check this by looking at what type of printer the labels are suitable for on the packaging.
Explore smudge-free labels.
FAQ
Recommended Products
Check out our recommendations of inkjet and laser labels below:
- Avery L7163-40 Ultragrip Laser Address Labels (560 Labels)
- Avery J8160-25 Inkjet Address Labels (525 Labels)
Summary
Explore our vast range of label products to support you at home or in the office, or alternatively, take a look at our comprehensive selection of affordable stationery to keep productivity levels high!