How to Scan a Document on a Printer
Using a printer to scan a document is a simple process which can improve your business’s productivity. Our guide covers how to scan a document on a printer, with step-by-step instructions and advice on scanning to email, USB and more.
- Why Scan a Document?
- Setup
- How to Scan a Document on a Printer: Step-by-Step
- Scanning Best Practices
- Troubleshooting
- FAQ
Why Scan a Document?
The process of scanning allows you to create digital copies of physical documents. This ensures document storage is safer and provides reassurance, allowing previously printed documents to become accessible to users across a shared network. By adopting a more systematic way of storing documents, they’re easier to find by others (provided that they’re named properly). This then leads to a more efficient workflow, preventing disruptions that could arise from misplaced documents. Reduce waste by scanning documents in place of printing duplicates, while simultaneously saving money on your copy paper spend.

A dependable multifunction printer, often abbreviated to MFP or also known as an all-in-one printer, ensures sharp scans and seamless integration with your business’s workflows. Check out our top picks of the best all-in-one printer that can scan.
Scanning for Archival Purposes
Scanning is especially important for archival jobs and hobbies, such as photography or scrapbooking. It protects fragile original photographs or records by creating a digital backup, safeguarding against loss. The process of scanning allows you to create a digitised archive, for quick retrieval, better organisation and efficient searching. Scanned photos are easier to share with family, friends and communities without risking accidental loss or damage.
Setup
In order to make the scanning process as straightforward as possible, follow the below advice:
Ensure your printer can scan before you start the process. A multifunction printer (MFP) is a device that has additional functionality, such as scanning, copying and faxing. To confirm your printer can scan, please consult your manual or the specifications online. If you’re looking for a new all-in-one printer, our range of multifunction printers effortlessly scan and print.
The printer needs to be connected to the computer (either via a wireless or wired connection). You also need to ensure printer drivers have been installed and are up-to-date.
Once the printer’s turned on, lift up the scanner lid and place the document face down on the glass if you have a flatbed scanner. Alternatively, load the sheet into the document feeder if your printer has one.

Prior to scanning, you may need to change the printer settings based on the document type used.
How to Scan a Document on a Printer: Step-by-Step
Windows

- Click ‘Start’ (Windows logo).
- Search for ‘Windows Fax and Scan’ in the search bar.
- Select ‘New Scan’.
- Ensure scanner details are correct. Here you ought to find your printer’s manufacturer and model number. From here, you can select ‘Change’ to edit this if necessary.
- Select ‘Profile’ to choose your document type from the drop-down menu.
- Change the scan colour by clicking on the ‘Colour format’ drop-down, and selecting either ‘Black and White’ or ‘Colour’.
- Choose what type of file you want your scan to be saved as with the ‘File type’ drop-down.
- Your scanner may allow you to change additional options as well.
- Click ‘Preview’ and make changes if necessary. Repeat this step until you’re happy with the scan.
- Then simply click ‘Scan’.
- You can find your scanned document by clicking ‘Start’, ‘File Explorer’, ‘Documents’ and then double-clicking ‘Scanned Documents’.
Mac

- Click the Apple logo.
- Head to ‘System Settings’.
- Open ‘Printers and Scanners’.
- Choose the printer you want to scan from.
- Find the ‘Scan’ tab, and then select ‘Open Scanner’.
- Click ‘Show Details’.
- Choose the ‘Format’ from the drop-down menu.
- Select the ‘Kind’ drop-down to scan in either ‘Black and White’ or ‘Colour’.
- Click the ‘Scan To’ drop-down and choose the storage location.
- Here you’ll find the ‘Resolution’, ‘Orientation’ and ‘Size’ settings.
- Click the ‘Scan’ button and you’ll be able to access the document where it was saved.
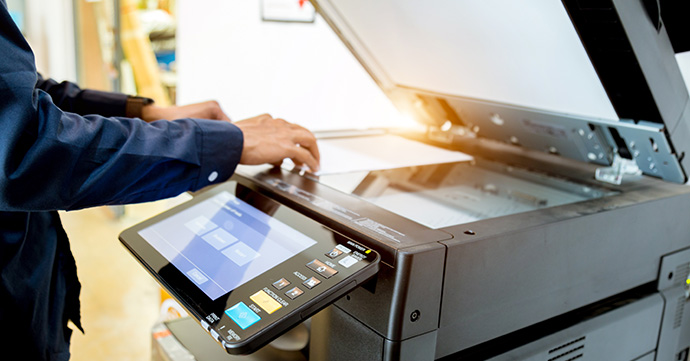
Printer Control Panel
There are numerous ways to scan from your printer’s control panel. You can save scans to a folder, send via email, save to USB and upload to the cloud. Find details of this below:
Scan to a Folder
Choose your destination folder and adjust settings before scanning the document.
Scan to Email
Emailing a scan can be an incredibly useful way to send an important document. Small business owners can scan their invoices directly to email, for example.
- Find your printer’s ‘Email’ application.
- Type the recipient’s email address into the ‘Add Recipient’ field.
- Edit the email subject line if you want to. You can also change the document name.
- Scan the document and send via email.
How to Scan to USB
- Plug the USB into the printer’s USB port.
- Find an option for ‘Scan to USB’.
- Lay the document on the scanner.
- Give the scanned document a name.
- Scan.
Uploading Scans to Cloud
Remote workers are able to scan documents to the cloud and access them from anywhere. Documents saved to the cloud can also be opened from your phone.
- Find the cloud application on the printer.
- Sign in to your cloud account.
- Select your destination folder.
- Scan your document. It will then be saved to the cloud application.
How to Scan on Your Phone

You can also scan from your iPhone. Use your phone camera, a dedicated scanner app or the Notes app for iPhones to easily and portably scan your documents. You should stick to an MFP printer for high-priority scans or if you’re scanning often though.
Scanning Best Practices
Document Positioning

Properly placing documents on the scanner enhances clarity and makes sure your scans are a true copy of the original. When scanning individual pages, use the scanner glass. You should lift up the lid, and with the document faced down, line it up with the size guides in the corners. Want to scan more than one page? The majority of MFPs feature a document feeder, which streamlines this process. Just make sure the document doesn’t have any staples or folds on the page. Simply use the paper guides to fit the document.
Printer Settings

- Use ‘Colour’ mode or ‘Black and White’ for text scans.
- Set your printer’s scanning resolution, it should be 300 dpi for regular documents.
File Names
Quickly find scanned documents by using understandable naming systems and accurately describing the contents of the scan with the file name. Once you have a system in place for naming scans don’t deviate from this so you can quickly find your files, especially in large archives. The naming system you use should also be logical, to ensure others accessing the files can find what they need without miscommunication, saving time and avoiding creating duplicates. Sticking to a particular naming convention maintains a systematic, professional approach to document management, which is crucial for businesses and archival work.
Troubleshooting
Scans not looking clear? Make sure the document is properly placed on the glass and the scanner glass is clean.
Having trouble connecting? The computer and printer need to be on the same network.
Computer not recognising the printer? Printer drivers should be up-to-date (if not, check the manufacturer’s website for the latest driver). Restart both devices.
FAQ

Summing Up
Keep your business or home running smoothly with a printer that also supports scanning. By creating a digital copy of a paper document, your business can securely share files, safeguard against loss and reduce paper waste. Using an all-in-one office printer to do so allows you to save both money and space, which is especially important for a small office or home.
Learn how to scan old photos and preserve your treasured memories with our helpful guide. Wanting to maintain productivity in a busy office? Find out how fix print spooler errors, as well as how much you could save over time with compatible cartridges.