Mastering Low Light Photography: Low-Light Smartphone Tips
Photography helps us capture important moments and snippets in time, but there’s nothing more disappointing than when a picture doesn’t come out right due to bad lighting.
Low-light conditions can result in blurry, grainy or dark images. Fortunately, advanced technology and a few handy tips mean you can master photography in low-light and take great pictures, even with your smartphone!

1. Use the Right Settings
Modern smartphones come equipped with advanced camera settings that can significantly enhance your low-light photography. Here are a few settings to adjust:
Night Mode: Many smartphones now have a dedicated night mode that optimises exposure and reduces noise. Ensure it’s activated in low-light situations.
ISO Sensitivity: ISO controls the camera’s sensitivity to light. Higher ISO values can help brighten your image but may introduce noise. Experiment to find the right balance.
Shutter Speed: Slower shutter speeds allow more light to hit the sensor but require a steady hand or a tripod to avoid blur.
2. Utilise Artificial Light
When natural light is insufficient, consider using artificial light sources:
Flash: While the built-in flash can be harsh, it can be softened by diffusing it with a piece of tissue or a small translucent object.
External Lighting: Portable LED lights or even the torch of another phone can help illuminate your subject without being too overpowering.
3. Stabilise Your Camera
Camera shake is a common issue in low-light photography, resulting in blurry images. To stabilise your camera:
Use a Tripod: A small, portable tripod can make a significant difference in keeping your camera steady. You can get tripods for your specific camera or smartphone for extra security and stability.
Lean on Stable Objects: If a tripod isn’t available, lean against a wall or place your smartphone on a stable surface to reduce shake. Stacked books make for a great make-do stand.
4. Focus on the Subject
In low-light conditions, your smartphone might struggle to autofocus. Help your camera by:
Tap to Focus: Manually tap on your subject on the screen to ensure it’s in focus.
Use Manual Focus: Some smartphones offer manual focus adjustments. Use this feature to sharpen your subject.
5. Edit Your Photos
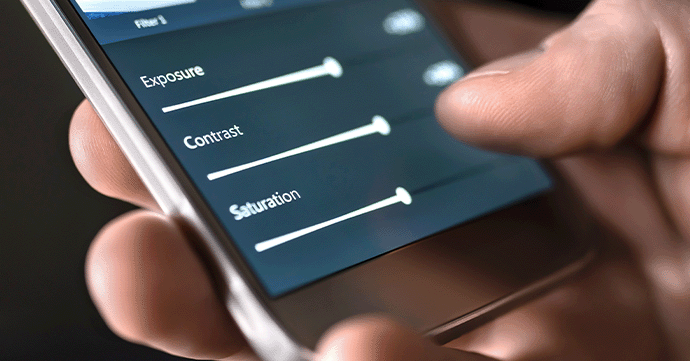
Post-processing can dramatically improve low-light images. Use photo editing apps to:
Adjust Brightness and Contrast: Brighten up your image and adjust the contrast to bring out details.
Reduce Noise: Noise reduction tools can help minimise the graininess of your photos.
Enhance Colours: Correct and enhance the colours to make your images more vibrant.
6. Explore HDR Mode
HDR (High Dynamic Range) mode captures multiple exposures of the same scene and combines them to create a well-lit image with balanced highlights and shadows. Use HDR mode to bring out details in low-light scenes.
7. Experiment with Composition
Good composition can make or break a photo. In low-light settings, pay extra attention to:
Leading Lines: Use natural lines to guide the viewer’s eye to the subject.
Rule of Thirds: Position your subject off-centre for a more balanced and visually interesting photo. Many smartphones have settings available for adding a grid to the camera screen, so you can line up and level your image before capturing, saving time in the editing process.
8. Take Multiple Shots
In low-light conditions, it’s often necessary to take several shots to get the perfect image. Experiment with different settings and angles, and don’t be afraid to take more photos than usual.
9. Use RAW Format
If your smartphone camera supports RAW format, use it. RAW files contain more data than JPEGs, giving you greater flexibility in post-processing to recover details from shadows and highlights.
Conclusion
Low-light photography can be challenging, but with these tips and the advanced features of modern smartphones, you can capture stunning images even in dimly lit environments. Experiment with your settings, use available light sources, stabilise your camera and don’t forget the power of post-processing.
Once you’ve mastered your photography using these tips, why not print them out to enjoy? Read our guide on How to Print Photos from Different Apps on your smartphone. If you want to get the most out of your printing, check out our guide to the Best Photo Printers and print using Cartridge People Own Brand Photo Paper for high-quality results.


